Editable Photoshop Sharpening
How to sharpen images in an editable way without using the Unsharp Mask
4th November 2006 · Last updated: 5th October 2016
This is incredible. I read in the November 2006 issue of Digital Camera magazine how you can sharpen your images without using the traditional Unsharp Mask at all. What's more, you can keep the sharpening effect editable by using layers, in a standard PSD file. So if you wanted to change the level of sharpness later, you can! Plus there are many more benefits, as I have found with a little experimentation.
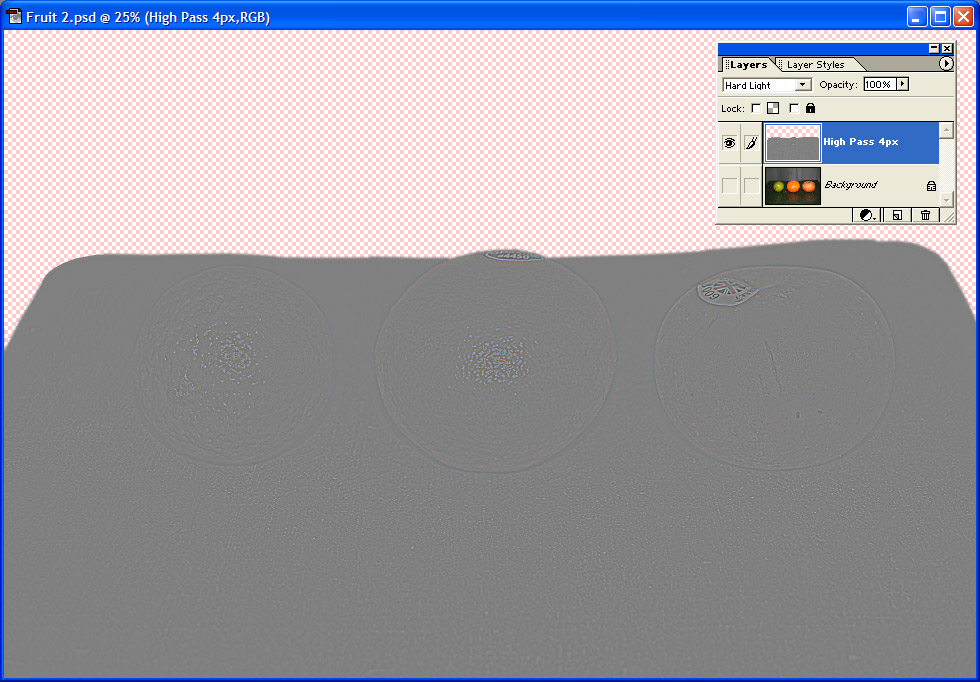
Firstly, the technique makes use of the High Pass filter. All you have to do is open your original photograph ready for sharpening, then duplicate the layer. Now run a High Pass filter over the new layer using a Radius value of 4 pixels. Of course the result looks all grey. The trick is to change the blending mode of the layer from Normal (the default) to Soft Light. This appears to sharpen the image. If it's not sharp enough, you can also use the Hard Light mode. Remember, the blending modes are available from the drop-down menu on the Layers palette.
You can also change the opacity to weaken the effect. But here comes the great part. If a section of your image doesn't need sharpening, or doing so creates noise, you can then either use the Reduce Noise filter, or add a mask to prevent the whole image being sharpened. Since I'm using Photoshop Elements, I don't have masks, but I can simply erase parts of the High Pass layer instead.
The whole time, your original photograph is untouched. Another benefit of this technique is that you can resize the image and not always need to sharpen it again! This is because the High Pass layer is still there. I did find the effect stopped at sizes below 600 pixels wide though, but you can always duplicate the High Pass layer to increase the effect again.
One thing to mention is that your PSD file will be quite big, even just using two layers. I started out with a 3.5Mb photograph, but ended up with a 55Mb PSD file! I got this down to 46.2Mb by switching off the option in Photoshop's Saving Files preference to "Maximize backwards compatibility in Photoshop format". That saves a lot of bytes, so is a useful tip to know anyway.
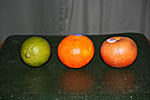
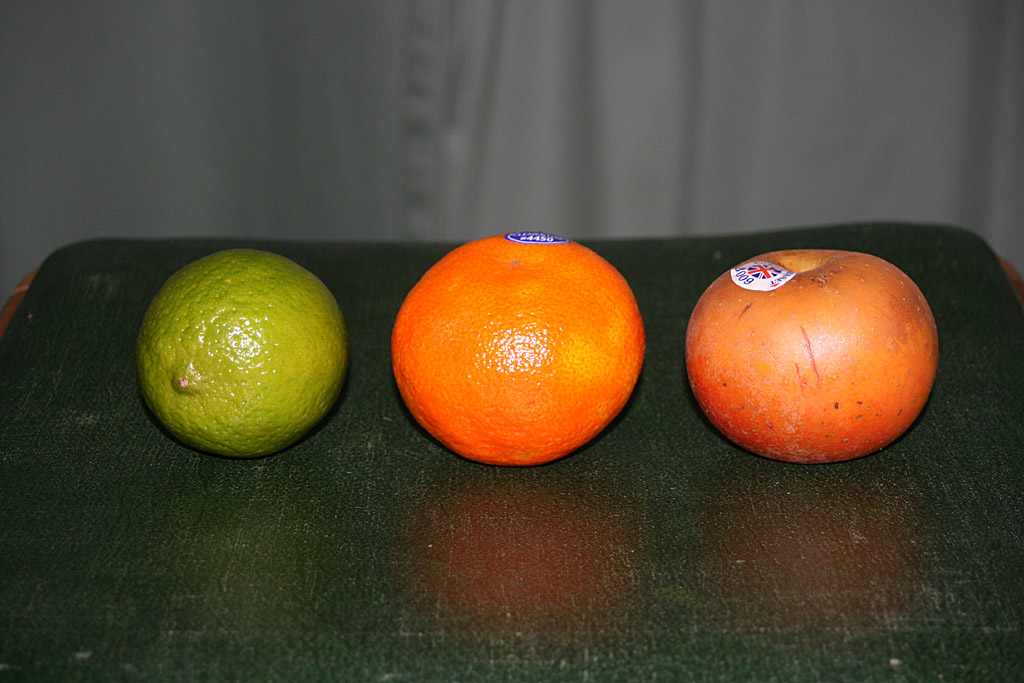
I'd like to end with the results I got by using the High Pass filter compared to the Unsharp Mask. Firstly, below is a photograph I took sharpened using the Unsharp Mask. (I forget the exact percentage used.) As you can see, the background at the top is a little grainy. Compare it to the second image, which was made using the High Pass filter, with the background cut out at the top, so it wasn't affected. The result is much nicer. The final image shows the actual High Pass layer I used.
| Unsharp Mask | High Pass | High Pass Layer |
|---|---|---|
 |
 |
 |
I then realised you could also use the Unsharp Mask on a duplicated layer, and cut out the bits you didn't want sharpening in the same way as above. The original layer underneath would then show through unsharpened. I'm not sure yet which method is better, but the High Pass filter certainly offers a lot of potential.
Comments (1)
Comments are locked on this topic. Thanks to everyone who posted a comment.