Half-Life 2 Tips
A list of tips I've found useful when playing the game.
27th November 2004 · Last updated: 5th October 2016
- Make use of keys not listed on the instruction sheet, such as Q to swap weapons quickly.
- When using the river-boat to approach a new area, step off and look around first. You may find hidden ammo behind shaded doors or rocks. Use the Zoom key to see what you're headed towards. Walk forward and kill any soldiers likely to be a problem when you're in the boat.
- When a character urges you to leave a scene, ignore them. Smash open any nearby crates for ammo or health packs. Always have a good look around before leaving any scene.
- Avoid killing nearby zombies (humans wearing headcrabs) with your guns. It simply wastes a lot of ammo. If you can, make use of the crowbar instead. I found you can move up to a zombie and hit them, then move back before they touch you. Repeat this and you can kill them without losing any health points at all.
- Crouch down to look under any shallow water. Sometimes you can see things, like fallen grates.
- Ammo and health packs can be picked up and moved just like other objects, but only when you're fully loaded with them. In other words, they aren't automatically absorbed! This means you can carry them to other parts of the level incase you need them there.
- Objects can be carried up ladders, but not easily.
- If you find any explosive objects in a high building that you might need at street-level later on, drop them out of windows or off ledges rather than leave them behind.
- If a ledge is too hard to reach by stacking objects lying around, there's usually an easier way you've missed.
- There's a secret area in City 17 in a space under a set of bridges, where gaps above you let in streams of manhacks at one point. There are a couple of wrecked cars scattered about. Under one section of the bridge it's too dark to see anything, but shine a torch up and you can see a square hole with an entrance at one side. I tried to stand on a car and climb up to it using a barrel but couldn't quite reach it. I'm going to have another go and let you know later how I got on. (I'll try and add a screenshot too.) If anyone knows any more, post a comment!
- Look in the following folder on your computer to find a list of all the map names.
C:\Program Files\Valve\Steam\SteamApps\--your steam username--\half-life 2\hl2\maps\soundcache - To see more of the game, you need to activate the console. Then you can enter commands to do things like walk through walls, never die, get any weapon and much, much more. To do this, right-click on the shortcut to Half-Life 2 on the desktop. (If there isn't one, you can always make one.) Now go into the Properties and add "-console" to the end of the program target field. Mine looks like this:
"C:\Program Files\Valve\Steam\Steam.exe" -applaunch 220 -console
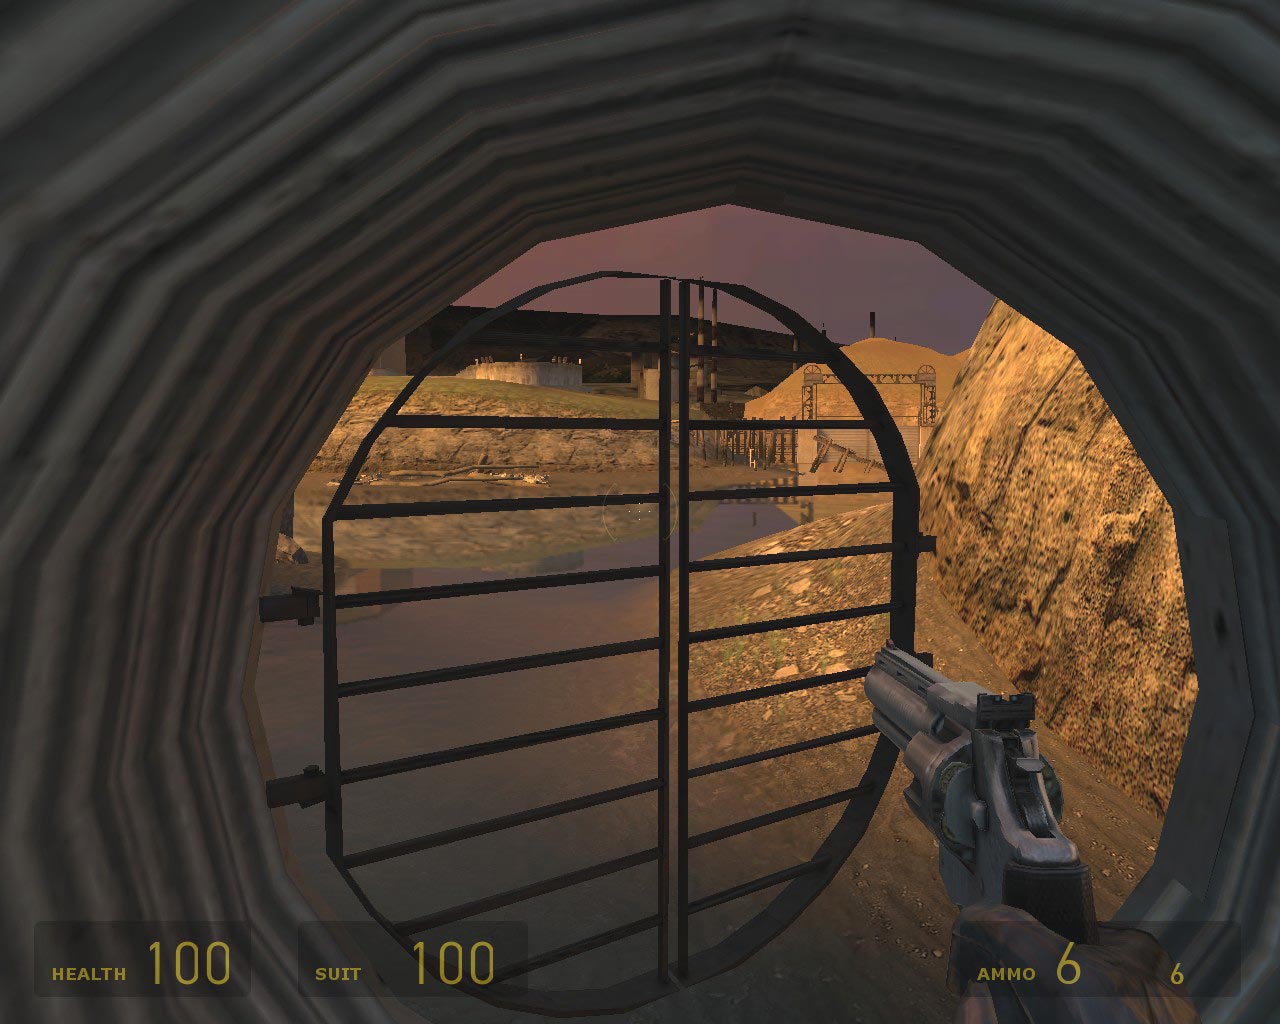
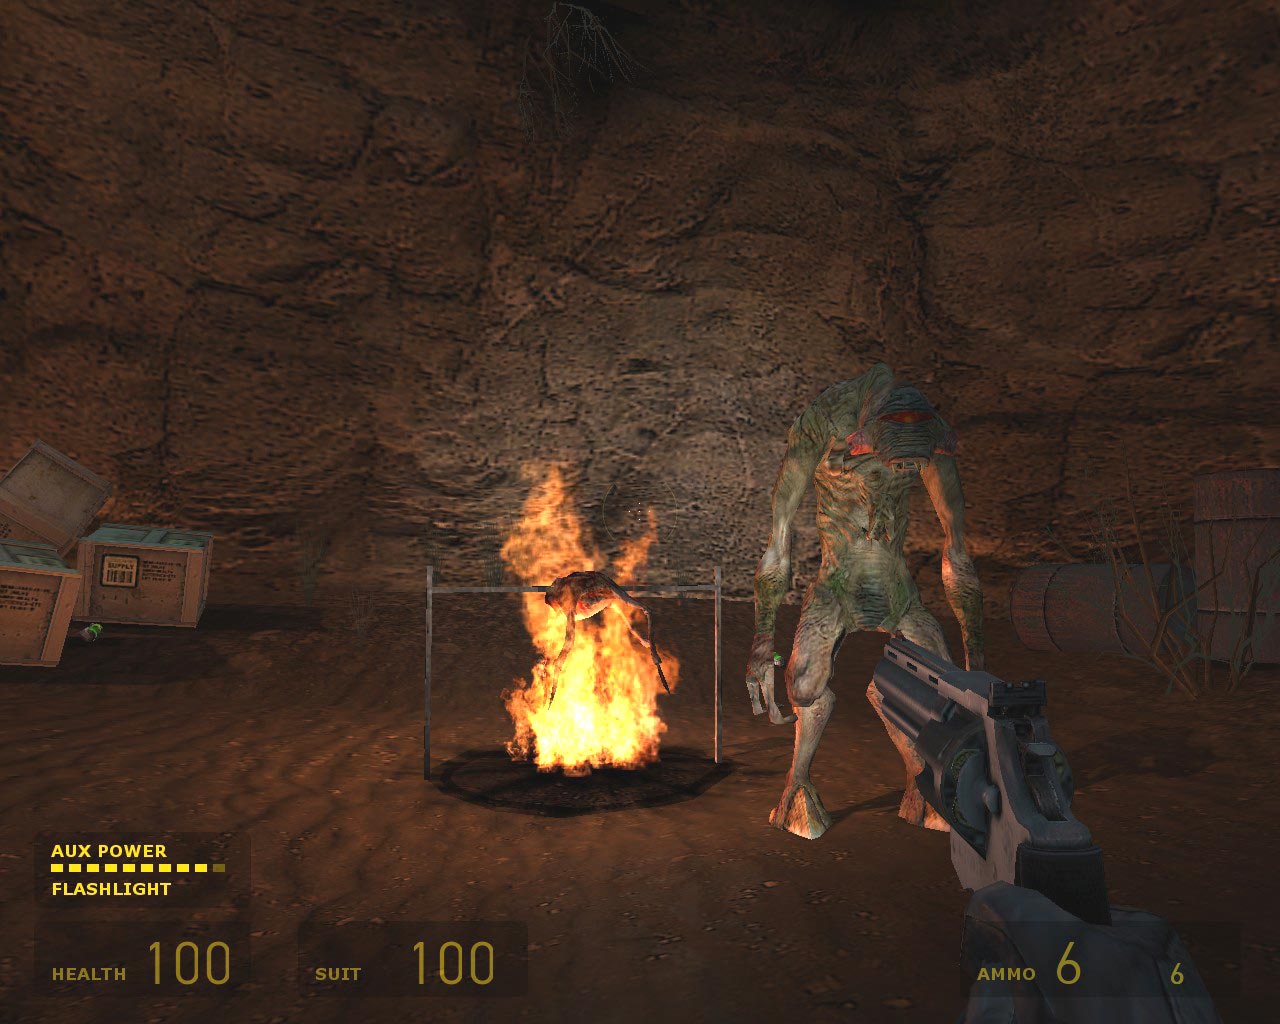
(I don't know what the "applaunch" part does - makes Steam open Half-Life 2 and not another Steam game?) Once you have done this, load the game and use the key underneath ESC (to the left of 1) to fire up the console during the game. There are a lot of exciting commands you can input! See the links below. - The secret cave can be found on the canal section just before you reach the dam (Black Mesa East). One of two grates is slightly ajar, leading to a tunnel where you'll find a vortigaunt roasting a headcrab. To locate it, see the screenshot below. Keep 'using' the vortigaunt with the E key as he has a lot to say.
I may add further tips later. Have you come across any yourself? If so, add a comment here, but try not to give away too much detail about the game incase it spoils it for someone who hasn't got as far as you. In fact, I will edit or delete such comments if they give away too much about the plot or the characters.
Further Reading
- My Half-Life 2 review
- Half-Life 2 faults I've noticed
- A superb Walkthrough complete with some console cheats.
- Half-Life 2 Cheats, Cheat Codes, Hints, Walk-Throughs and FAQs at GameSpot - has even more console commands, along with a secret area mentioned.
Comments (2)
Comments are locked on this topic. Thanks to everyone who posted a comment.
- zzaminski:
here's a hint for the prison-level "moveable" turrets challenge/puzzle, imo, one of the more challenging. there are 3 puzzles. if you like to know howidunit read on...
the 'control room'
------------------
you have 2 re-programmed turrets. place then at an angle facing the two 'entrances' to the control room but on the *inside*. don't put it outside near the stairs because that will make it harder for you to hit them and you have to run around more. guard both turrets from inside the control-room.
use shotgun for close-quarter takedowns.
the 'jail-cells'
----------------
there are 4 entrances the CPs will attack from - the exits/entrances to the cells (perhaps also on the upper-landing on one end). the trick is to place the 4 turrets at an angle facing an entrance, a little distance away from the entrance (the midway between 2 entry points is also good), *and* against a pillar (not wall). the pillar will/may prevent the tripod-turret from falling over!
put yourself in the area with the cache of ammo (*not* where the health/shield is)
run in and out to check if any turret was knocked over and to finish CPs when they are busy with the turrets. do *not* use grenades if you don't want to risk knocking over turrets yourself. when manhacks appear switch to grav-gun, grab-and-shoot manhacks against floor/wall. or just fireaway.
the teleport-chamber
--------------------
there are 3 CP entry points. one to the left of teleporter (A). one behind and to the right of teleporter (B). and one on the left and bottom of teleporter (C - opposite turret 'holders')
place 1 turret in the 'gaps' of the steps facing (A) entrance. this *will* prevent it from falling over and prevent CPs from closing in.
place 1 turret on the raised 'landing' of the still unopened teleporter facing (B) entrance.
place 2 turrets at an angle facing (C) entrance. the angle is such that the turrets is just outside the 'glass' wall. the idea is to make CPs approach without cover and get cut down from both guns. also, i put one slightly closer to the entrance.
with this arrangement i hardly had to shoot. only check and up-right fallen turrets.
if i seem to have one extra turrets it is because i 'took' a turret from the 'control room' puzzle all the way until the teleport chamber. re-programmed turret save ammo and good for checking/clearing rooms *before* you enter them 8-P.
unfortunately, you cannot take the re-programmed turret through the teleporter! i brought one into the teleporter but it did not 'port over to city17 (bah)...good luck!
Posted on 6 December 2004 at 8:49 am ¶ - zzaminski:
"there are 3 CP entry points. one to the left of teleporter (A)."
sorry i mean on your *right* not left =P when facing the teleporter.
Posted on 6 December 2004 at 8:52 am 